
Get Tall for Animals Egg Locations Guide
Where to find eggs in Get Tall for Animals: the documented Guard-held egg zones from the starting slope to the savanna, the 100/400/1,000 Power gates on the climb, and what happens after a pickup.
Eggs in Get Tall for Animals are not scattered pickups — each zone's giant animal Guard stands beside its own egg. The closest documented source is a giant-rabbit egg on the starting mountain slope: eat enough burgers to grow tall enough to climb, take the egg, carry it home and place it at your house before the timer runs out. In a recorded run of the game it hatched into a giant rabbit in about a minute. From that slope, one upward path leads past higher-gated zones with richer eggs: a parrot-and-koala level, the shark beach, the snowy Mammoth floor and a savanna.
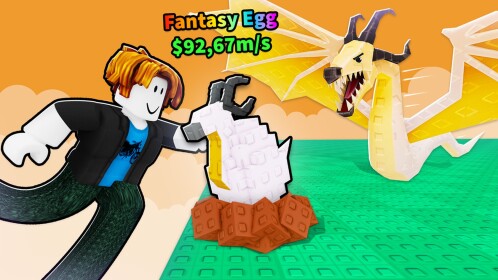
How egg sources work
The official game description sets the loop: eat to increase your Grow Value, grow your legs to reach the sky islands, steal eggs from the Guards, hatch them to discover animals, and earn Cash from your animals (also offline). In the world, that means Guards are not counter NPCs — each is a large animal stationed in its biome with its egg placed beside it, and it gives chase the moment its egg is taken. The egg only counts once it is carried home and placed at your house, where it hatches into the animal whose Guard it was taken from. Every documented pickup in the recorded run followed that pattern, from the giant rabbit to the parrot, koala, llama, shark, dinosaur, kangaroo and ostrich.
Reaching the zones: the Power gates on one climb
There is a single upward route, and its doors open on your height. Eating burgers raises your Grow Value — the Power figure the gates check — and grows your legs so you can climb further. The gate values below were read from route signage during the recorded run:
- 100 Power opens the door to the second level
- 400 Power opens the shark beach
- 1,000 Power opens the ice mountain
- The final white-land area sits behind a gate the players read as roughly 6,500 Power, though they were not sure of the number — treat that figure as unconfirmed
Upgrading the burger lets you eat more and faster, which is how you push past the next gate; in the run, a burger upgrade came right before the push to the third tier. The gate is physical, not a quest check: one of the two players in the recording simply could not reach the Mammoth floor until they had eaten their way taller. If you want the growing mechanics in detail, see the how to grow taller guide. Burger upgrades cost Cash, and the Codes page is a quick way to top up when you are short.
Egg locations by zone
The zones below are listed in climb order. Hatch times are as observed in that one recorded run.
| Zone | Landmark to look for | Power gate | Documented eggs |
|---|---|---|---|
| Starting slope | The high mountain at spawn, climbable as soon as your legs are long enough | — | Giant rabbit egg (hatches in about 1 minute) |
| Second level | The floor above the first gate door | 100 | A special egg and a parrot egg sitting on the floor; koala and llama pickups on the early climb (koala about 25 seconds, llama about 3 minutes) |
| Shark beach | Beach-and-sea zone named for Megalodon | 400 | Megalodon egg (about 1 hour), crab egg, jellyfish eggs including a special rare giant jellyfish egg (about 3 minutes) |
| Ice mountain | The snowy "Mammoth floor" high on the mountain; one egg sits behind the mammoth near a waterfall | 1,000 | Dinosaur (T-Rex-type) egg (about 3 minutes), polar bear egg (about 30 minutes), mammoth-area eggs |
| Savanna | Open grassland reached above the ice floor | beyond 1,000 (value not documented) | Kangaroo, ostrich, lion and gorilla eggs; a special, rarest-tier Garodon egg (about 1 hour) |
| White land / sky | Final area past the savanna | read as roughly 6,500 (unconfirmed) | Not documented in the available footage |
Two things help you read this table in the world. First, each zone's egg hatches into that zone's animal, so the Guard standing beside an egg tells you what you are carrying home. Second, rarer variants appeared inside these same zones in the run — the giant jellyfish egg at the beach and the Garodon egg in the savanna — but where the rare size, mutation, DIVINE and Cosmic tiers come from is not documented. The egg list covers egg types and rarities in full.
Planning the run back
The pickup resolves only when the egg reaches your house, so the return trip decides success:
- Before grabbing an egg, note the way home — several pickups in the run beat the timer by seconds, and the distance from each zone to your house varies.
- Taking the egg triggers its Guard's chase, and on the way back a red line may not be crossed.
- Place the egg at your house before the timer runs out; it then hatches into that Guard's animal.
Two zone boundaries are worth knowing when you route: at the shark beach the chaser follows through its water but gives up once you step outside it, and at the ice mountain the players grabbed the waterfall egg while the Guard was wading in the waterfall. The full steal-and-evade playbook is in the how to steal eggs guide — read it once you can reach a source.
After the egg is placed
A placed egg hatches into the animal of the Guard it was taken from, and the animal then earns Cash for you, including offline. Hatch times vary a lot by animal — roughly a minute for the giant rabbit, a few minutes for llama, jellyfish and dinosaur eggs, half an hour for the polar bear, about an hour for the special Garodon and the megalodon egg in the run. For what happens after placement, see the how to hatch eggs guide.
How much to trust these spots
Everything above the official description comes from one recorded gameplay run, so treat each spot as documented at least once, not as a fixed-timer spawn — respawn behavior at these spots was not observed. The 100/400/1,000 gate values were read from route signage in that run, and the ~6,500 figure for the last gate carried visible uncertainty. After a map or update change, recheck the routes and Guard positions before relying on them.
Related Guides
How to Steal Eggs
Reach the sky islands, grab an egg while the Guard is away, and survive the chase home.
Sky Islands Guide
Confirmed island tiers, the power gates seen on one climb, and what lives on each layer.
Egg List (Verified So Far)
Every verified egg type so far: rare sizes, mutations, Divine eggs, and the zone eggs seen in footage.