
Get Tall for Animals Beginner Guide
A chronological first-session walkthrough for Get Tall for Animals: eat to grow your legs, reach the egg area, carry an egg home, hatch your first animal, collect its per-second cash (even offline), and buy your first burger upgrade.
Your first useful move in Get Tall for Animals costs nothing: eat the hamburgers sitting in front of your starter house. Eating raises your Grow Value, Grow Value lengthens your legs, and that height is the key to everything else — high terrain, the sky islands, and the eggs waiting up there. Your next confirmed objective follows directly: grab an egg, carry it home before a timer runs out, place it at your house, and wait about a minute. It hatches into an animal that pays you cash every second, even while you're offline.
One honest note before the walkthrough: this guide does not name the exact keys, buttons, or on-screen prompts for moving and eating, because the game's first-session controls haven't been captured for it. Get Tall for Animals officially runs on PC, mobile, tablet, and console with full controller support, so follow the prompts your own platform shows in-game. Everything else below — the order of objectives and the numbers you'll see — follows the official game listing and a recorded first session. Exact figures come from that single recorded run, so treat the values in this guide as observations that may vary between sessions or change with updates.
Step 1: Eat the hamburgers in front of your house
Burgers are placed right outside your starter house, and the recorded session opens with exactly this: to get tall, you eat. Every bite raises your Grow Value and visibly stretches your legs. You'll know it's working when you can climb terrain that blocked you minutes earlier — the players watched a shut gate open once they had eaten enough, and it led them up to floor 2.
Eating is never a one-time tutorial step. Whenever your height falls short of what's ahead, the answer is the same: come back, eat more, and grow taller until the way up is open. What the stat itself does is covered in more depth on the Grow Value page.
Step 2: Climb the height gates toward the islands
Your new height is a ticket, and the game checks it at each stage gate. The recorded players read these thresholds off the gates and were careful to point out that the gate checks a power value, not your level. What they saw in one session:
| Gate | Observed required power |
|---|---|
| Stage 2 | 100 |
| Stage 3 (beach) | 400 |
| Mountain | 1,000 |
| Heaven (final gate shown) | 6,500 (figure partly unclear) |
The useful habit here is checking the gate number before you commit to a climb. If the required power is above what you've built, go eat instead of racing a gate that won't open. The stage structure beyond the first floors — islands, mountain, heaven — is the same climb mapped out on the sky islands page.
Step 3: Take an egg from the Guards and hurry home
Once you're tall enough, the game points you to the egg area, where the official description is blunt: steal eggs from the Guards. In the recorded session, the grab itself was simple — the players snatched an egg they recognized as a giant rabbit and immediately turned for home.
The hurry is real. They repeatedly asked whether they'd make it "in time," once with 13 seconds left on the clock, and made it back just as it expired. What the timer's exact rule is — when it starts, what happens if it runs out — isn't stated in anything verifiable, so treat it as straightforward time pressure: grab the egg and head straight home, no detours. The how to steal eggs guide covers the Guards' egg runs in detail, and the egg locations page maps where eggs sit across the stages.
Step 4: Place the egg at your house and wait out the hatch
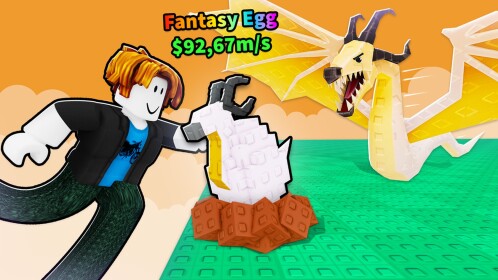
Carry the egg all the way back and place it at your house — that's the confirmed hand-off. Then it's a waiting game. Observed hatch times in one session: the giant rabbit egg took about 1 minute, one other animal came out in about 25 seconds, and a rama (a giraffe-like animal) took 3 minutes. Different animals clearly take different amounts of time, but the exact figure for any given egg may vary, so set expectations at "a minute or a few" rather than a stopwatch promise. The egg hatching guide breaks the mechanics down further, and the egg list shows what's out there beyond your first few finds — including the rare size, mutation, and Divine egg varieties the official listing advertises.
Step 5: Watch your animal earn
When the egg pops, place the hatched animal at your house and it goes to work. The session's giant rabbit showed an income of about 149 per second, a parrot 12, and a cola placed later showed 217 the moment it was set down. The official listing adds the part that matters most for how you play: animals keep earning cash even while you're offline, so there's no penalty for logging off.
One gap worth knowing: the session showed the per-second figures on placement but never distinctly showed how accumulated income is collected, so don't assume a pickup step. How the numbers scale is covered on the animal income page, with faster earning routes on the cash guide and the full roster on the animal list.
Step 6: Spend your first cash on a burger upgrade
Your earliest meaningful purchase is a burger upgrade. In the session, the players bought the level 3-to-4 upgrade with just enough cash on hand, and the effect was immediate: they could eat more food and eat it faster, which made them grow much taller much faster — shortly afterward they sat at level 11 and could reach floor 3. The burger you eat has multiple tiers, with a final purple tier far up the chain.
One caution: the official listing names three upgrade categories — PEN, BURGER, and TRAIL — but only burger upgrades were demonstrated in the recorded session, so don't assume the other two behave the same way. When you're ready to plan purchases beyond the first one, the best upgrades page ranks them and the progression guide maps the long game.
Two menus worth checking
Two interface pieces observed in the session are easy to miss:
- The rewards menu — a special button on the right side of the screen with a book icon opens a menu where rewards can be claimed, levels progress as well, and companions found along the various stages can be collected. Open it early and check back.
- The animal release button — animals you own can be brought out from a button in the menu, then placed at your house like any hatched animal, where they start paying cash.
First-session mistakes to skip
- Climbing before eating. The gates check your built-up height, so wandering to a 400-power beach gate at 100 power gets you a closed door and a walk back to the burgers.
- Sightseeing mid-egg-run. The clock the players raced was unforgiving; the safe pattern is grab, turn, go.
- Treating the session numbers as permanent. Hatch times, gate values, and per-second cash all come from one recorded run and can shift with updates.
- Forgetting your animals while offline. They earn regardless, so ending a session right after placing a new animal is a perfectly good play.
Before you queue up: the Release boost
The official listing advertises the code Release for a free XP boost, which speeds up early growth — a nice optional extra, though the loop above works fine without it. Redemption steps and the current list live on the codes page.
That's the whole first journey: eat, climb, steal, hatch, earn, upgrade. Once the loop repeats itself naturally, this beginner guide's job is done — the step-specific pages linked above take over wherever you hit a wall, and if raw speed is what you're after, the grow tall fast page pushes height further than a first session needs.
Related Guides
How to Grow Taller
Learn how eating raises Grow Value, which upgrades help, and how to pass each zone's power gate.
How to Steal Eggs
Reach the sky islands, grab an egg while the Guard is away, and survive the chase home.
How to Hatch Eggs
Carry an egg home, place it down, and wait the countdown — the verified hatch loop with observed times.
Best Upgrades: Goal-Based Buy Order
A goal-based buy order: Burger upgrades first for the early climb, Pen later, Trail unranked.